Saving Room to Sims 4 Library & Gallery
Save your room to your Library & the Community Gallery
Save & Share a Room
to library &/or community gallery
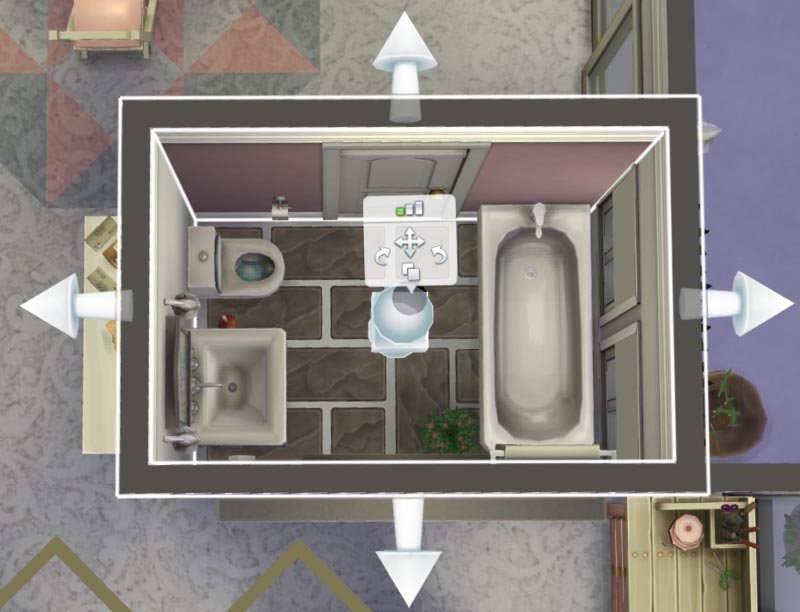
- In build mode, and in ‘walls-up’ view, click a wall of the room you want to save. This will highlight the room specifically like in the screenshot below:
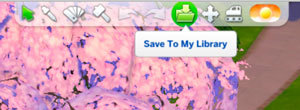
- Click the “Save to My Library” icon…
…from the drop-down select the bottom icon, called “Save Room”.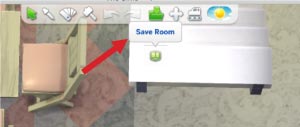
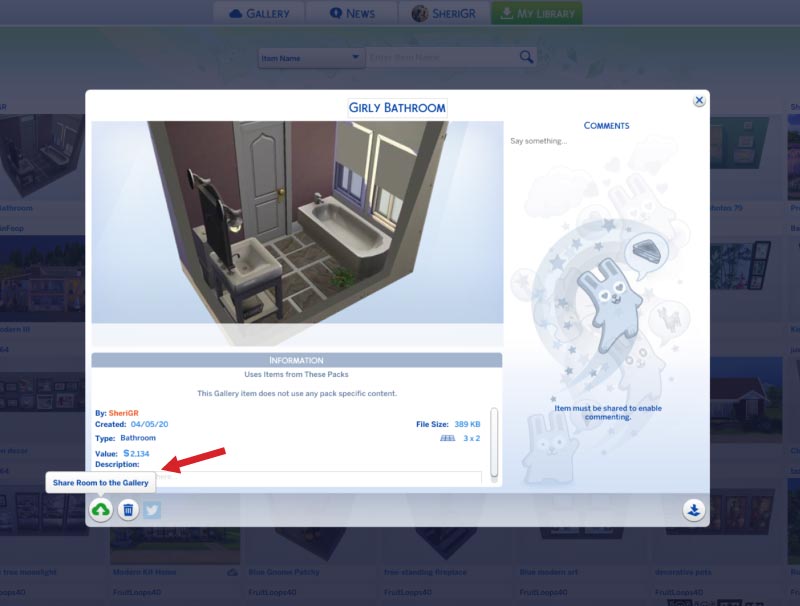
- From the room’s pop-up, name the room, select the room ‘type’, add a description, then select “Save Room to My Library”:
(Alternately you could click the cloud icon and just share to the Gallery at this point, but then you would not have a copy of the room saved to your Library.)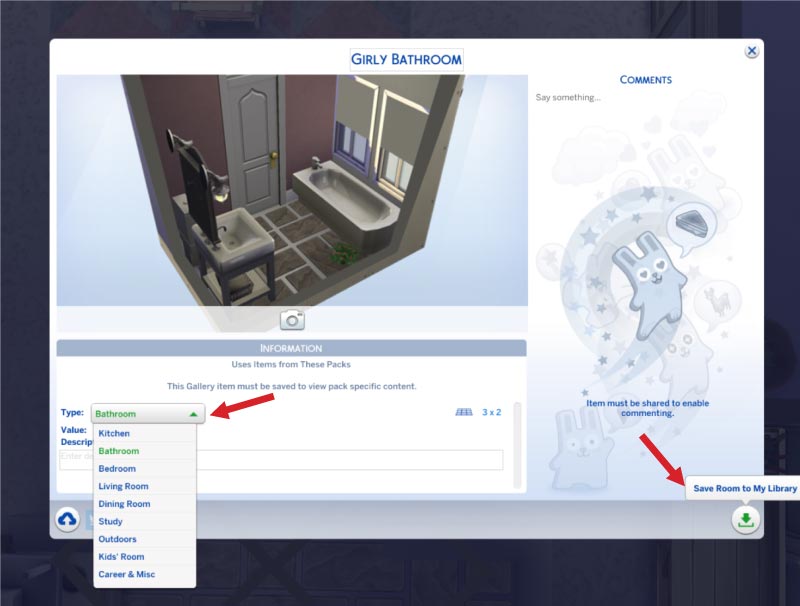
- Now your Room has been saved to your Library.
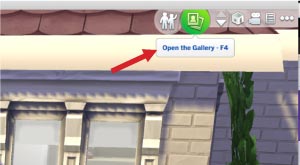
- To view your Library items or to share an item from your Library to the Community Gallery, please open the gallery…
… then select the “My Library” tab.
To share to the Community Gallery, select the Room or other item you want to share to the Gallery: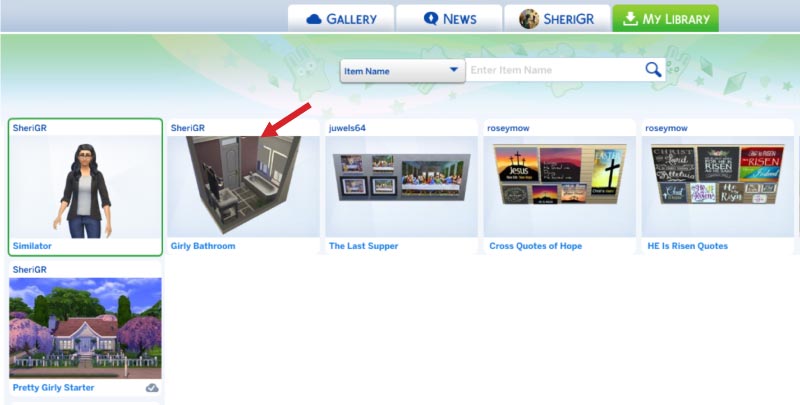
- This will open a popup of the Library item. You can edit the title & description if you like here. Now click the cloud icon to share to the Community Gallery. When an item has a green cloud button with a checkmark (or greyed from ‘all’ view), this indicates it is shared to the Gallery. If the item has a blue cloud button with an arrow (or no cloud from ‘all’ view), this indicates it has not been shared to the Gallery: